7. Jupyter
This chapter describes how to operate Jupyter Notebook (or JupyterLab) on compute nodes, and how to run Python programs that run in MPI parallel on it.
This example uses the environment ~/example created in Job Execution Method .
Please change /home/groupxxx/user1 depending on the name of the logged in user account.
Note
The path to the home directory of the logged-in user can be found with the following command:
[user1@loginvm-XXX ~]$ pwd
/home/groupxxx/user1
7.1. Preparation
You use an Interactive job to enter the compute nodes. The number of compute nodes is limited, so please exit when you are finished.
[user1@loginvm-XXX ~]$  salloc -N 1 -p Interactive --time=1:00:00
[user1@fx-XX-XX-XX ~]$
7.1.1. Installing required packages
Install the following packages.
[user1@fx-XX-XX-XX ~]$ cd example
[user1@fx-XX-XX-XX example]$ source qenv/bin/activate
(qenv) [user1@fx-XX-XX-XX example]$ pip install mpi4py jupyter ipyparallel jupyter_server

# If you use JupyterLab, run `pip install jupyterlab`.
# Also, in the following discussion, replace the Jupyter Notebook with the JupyterLab.
7.1.2. IPython Parallel settings
You use IPython Parallel (ipyparallel) to run Python programs that run in MPI parallel on the Jupyter Notebook.
7.1.2.1. Preparing NUMA Control file
/home/groupxxx/user1/local/bin/numa-launcher.numactl related operations described in job.sh in Job Execution Method.)#!/usr/bin/bash
LSIZE=${OMPI_COMM_WORLD_LOCAL_SIZE}
LRANK=${OMPI_COMM_WORLD_LOCAL_RANK}
COM=$1
shift
if [ $LSIZE -eq 1 ]; then
numactl -m 0-3 -N 0-3 ${COM} "$@"
elif [ $LSIZE -eq 4 ]; then
numactl -N ${LRANK} -m ${LRANK} ${COM} "$@"
else
${COM} "$@"
fi
You grant execute permission.
$ chmod +x /home/groupxxx/user1/local/bin/numa-launcher
7.1.2.2. Preparing IPython configuration files
(qenv) [user1@fx-XX-XX-XX example]$ ipython profile create example-profile --parallel
After execution, open ~/.ipython/profile_example-profile/ipcluster_config.py and specify the following.
c.MPILauncher.mpi_args = ["-x", "UCX_IB_MLX5_DEVX=no", "-x", "OMP_PROC_BIND=TRUE", "-x", "OMP_NUM_THREADS=1", "-x", "QULACS_NUM_THREADS=48", "-x", "LD_PRELOAD=/lib64/libgomp.so.1"]
c.MPILauncher.mpi_cmd = ['mpirun']

import sys
c.MPIEngineSetLauncher.engine_cmd = ['/home/groupxxx/user1/local/bin/numa-launcher', sys.executable, '-m', 'ipyparallel.engine']
c.MPIEngineSetLauncher.engine_args = ['--profile', 'example-profile']
In this example, the environment variables described in job.sh created in Job Execution Method are set. Please change the path to numa-launcher and the profile name accordingly.
Note
If you need to set environment variables to run your Python program, add them with the -x option to the c.MPILauncher.mpi_args entry above.
7.1.2.3. Configure port forwarding
You set port forwarding from your local environment to the compute node(fx-XX-XX-XX) used by the Interactive job. You open a new terminal on your local environment and use an ssh port forwarding command as follows. You can bring up the Jupyter Notebook screen in your local web browser.
ssh -N -L 8888:fx-XX-XX-XX:8888 qsim
7.2. Execution
You will run IPython on the backend and run it from the Jupyter Notebook. The following describes how to execute the command.
7.2.1. Starting IPython Parallel
You create the following batch file. Please refer to the batch file created in Creating a batch file. The -n option specifies the parallel number (number of compute nodes).
#!/usr/bin/bash

#SBATCH -p Batch
#SBATCH -o test-ipy-%j # Output file name
#SBATCH -N 2 # Number of nodes allocated

ipcluster start -n 2 --engines=MPI --ip='*' --profile=example-profile
You submit the job. Open the output file and verify that startup is complete.
(qenv) [user1@fx-XX-XX-XX example]$ sbatch ipython.job
(qenv) [user1@fx-XX-XX-XX example]$
(qenv) [user1@fx-XX-XX-XX example]$ tail test-ipy-XXX
2022-03-29 11:27:24.656 [IPClusterStart] Starting ipcluster with [daemonize=False]
2022-03-29 11:27:25.759 [IPClusterStart] Starting 2 engines with <class 'ipyparallel.cluster.launcher.MPIEngineSetLauncher'>
2022-03-29 11:27:55.803 [IPClusterStart] Engines appear to have started successfully
(qenv) [user1@fx-XX-XX-XX example]$ squeue # Get a list of running jobs
           JOBID PARTITION     NAME     USER ST       TIME  NODES NODELIST(REASON)
           10696     Batch ipython.     user1 R       0:18      2 fx-01-10-[04-05]
           10694 Interacti interact     user1 R       0:24      2 fx-01-12-[00-01]
(qenv) [user1@fx-XX-XX-XX example]$ scancel 10696 # ipython.jobのJOBID
7.2.2. Starting Jupyter Notebook
You start Jupyter Notebook after ipcluster has finished booting.
(qenv) [user1@fx-XX-XX-XX example]$
(qenv) [user1@fx-XX-XX-XX example]$ jupyter notebook --ip='*'
# If you want to use JupyterLab, run jupyter lab instead of jupyter notebook.
When Jupyter Notebook is started, the following message is displayed.
To access the notebook, open this file in a browser:
    file:///home/user3/.local/share/jupyter/runtime/nbserver-40491-open.html
Or copy and paste one of these URLs:
    http://localhost:8888/?token=2c9932ac7b7b813b925e460035903e21ed48394a8614348a
 or http://127.0.0.1:8888/?token=2c9932ac7b7b813b925e460035903e21ed48394a8614348a
If you open the URL http://127.0.0.1:8888/?token shown here in a browser, the Jupyter Notebook will be displayed.
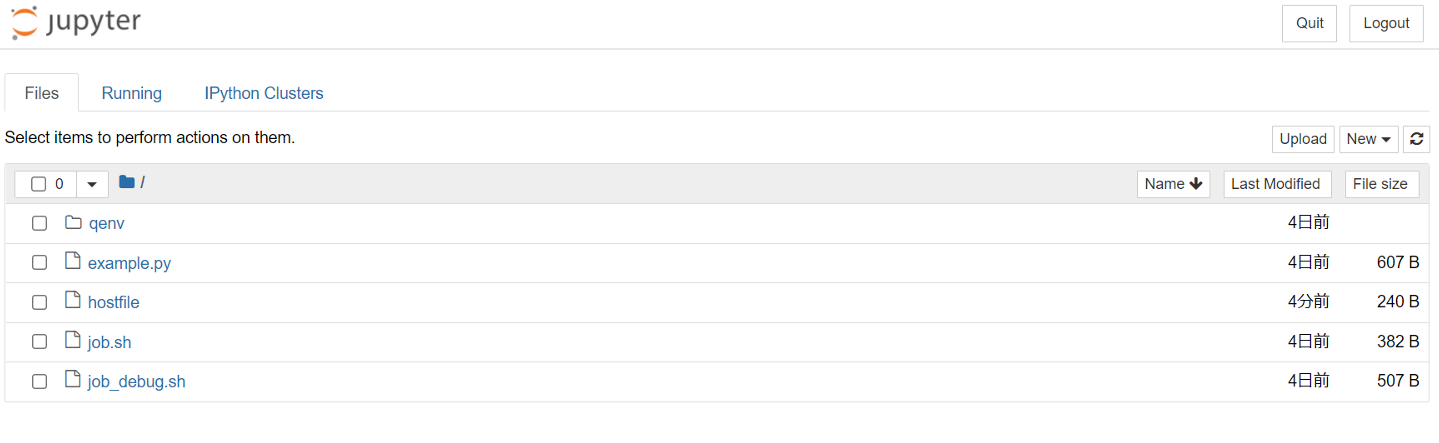
7.2.3. Working with Jupyter Notebook
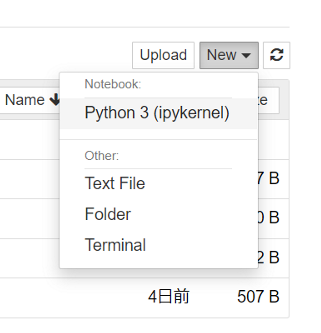
Create a new Python3 file.
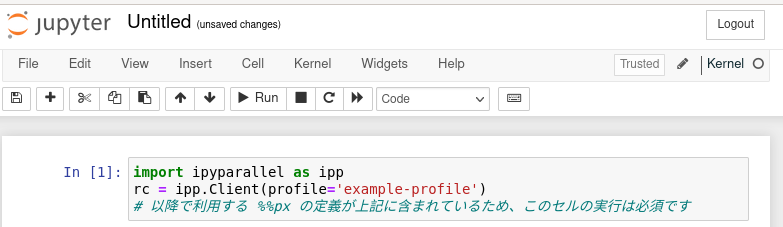
Create a cell in the open notebook and run it as follows.
import ipyparallel as ipp
rc = ipp.Client(profile='example-profile') #Profile name set in "Preparing IPython configuration files"
# Execution of this cell is mandatory because it contains the definition of %%px which will be used after.
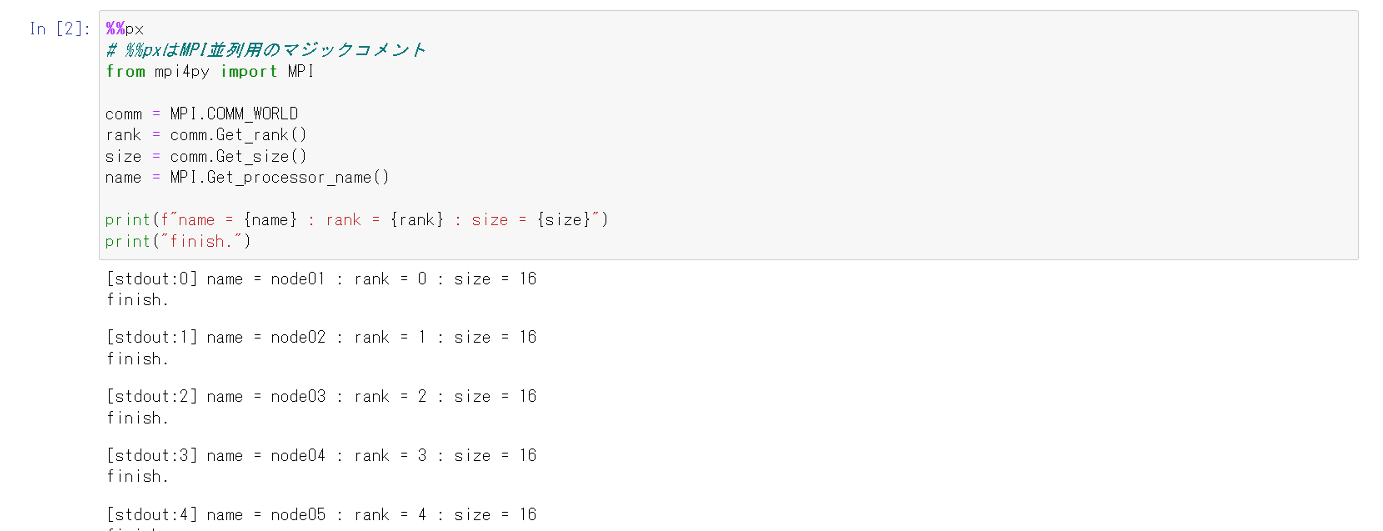
%%px
# %%px is a magic comment for MPI parallelism
from mpi4py import MPI

comm = MPI.COMM_WORLD
rank = comm.Get_rank()
size = comm.Get_size()
name = MPI.Get_processor_name()

print(f"name = {name} : rank = {rank} : size = {size}")
print("finish.")
You can run a quantum program using mpiQulacs by writing the following in the cell.
%%px
from qulacs import QuantumCircuit, QuantumState
from mpi4py import MPI

# Seed of random number
seed=1234

# Get process rank
comm = MPI.COMM_WORLD
rank = comm.Get_rank()

# Prepare quantum states
state = QuantumState(3, use_multi_cpu=True)
state.set_Haar_random_state(seed)

# Prepare uantum circuits
circuit = QuantumCircuit(3)
circuit.add_X_gate(0)
circuit.add_RX_gate(1, 0.5)

# Execution
circuit.update_quantum_state(state)

# Sampling
sampled_values = state.sampling(100, seed)

# Show results only at rank 0 (node01)
if rank == 0:
    print(sampled_values)

Note
When you run mpirun from the command line, there is a wait time for the ssh connection to be established each time you run it, but when you run cells on the Jupyter Notebook, there is no wait time because the ssh connection between the nodes is already established when you run ipcluster.